The ability to "stitch" together (offline or in real-time) multiple images taken simultaneously by multiple cameras and/or sequentially by a single camera, in both cases capturing varying viewpoints of a scene, is becoming an increasingly appealing (if not necessary) capability in an expanding variety of applications. High quality of results is a critical requirement, one that's a particular challenge in price-sensitive consumer and similar applications due to their cost-driven quality shortcomings in optics, image sensors, and other components. And quality and cost aren't the sole factors that bear consideration in a design; power consumption, size and weight, latency and other performance metrics, and other attributes are also critical.
Seamlessly combining multiple images capturing varying perspectives of a scene, whether taken simultaneously from multiple cameras or sequentially from a single camera, is a feature which first gained prominence with the so-called "panorama" mode supported in image sensor-equipped smartphones and tablets. Newer smartphones offer supplemental camera accessories capable of capturing a 360-degree view of a scene in a single exposure. The feature has also spread to a diversity of applications: semi- and fully autonomous vehicles, drones, standalone consumer cameras and professional multi-camera capture rigs, etc. And it's now being used to not only deliver "surround" still images but also high frame rate, high resolution and otherwise "rich" video. The ramping popularity of various AR (augmented reality) and VR (virtual reality) platforms for content playback has further accelerated consumer awareness and demand.
Early, rudimentary "stitching" techniques produced sub-par quality results, thereby compelling developers to adopt more advanced computational photography and other computer vision algorithms. Computer vision functions that will be showcased in the following sections implement seamless "stitching" of multiple images together, including aligning features between images and balancing exposure, color balance and other characteristics of each image. Dewarping to eliminate perspective and lens distortions is critical to a high quality result, as is calibration to adjust for misalignment between cameras (as well as to correct for alignment shifts over time and use). Highlighted functions include those for ADAS (advanced driver assistance systems) and autonomous vehicles, as well as for both professional and consumer video capture setups; the concepts discussed will also be more broadly applicable to other surround view product opportunities. And the article also introduces readers to an industry alliance created to help product creators incorporate vision capabilities into their hardware and software, along with outlining the technical resources that this alliance provides (see sidebar "Additional Developer Assistance").
Surround View for ADAS and Autonomous Vehicles
The following essay was written by Alliance member company videantis and a development partner, ADASENS. It showcases a key application opportunity for surround view functions: leveraging the video outputs of multiple cameras to deliver a distortion-free and comprehensive perspective around a car to human and, increasingly, autonomous drivers.
In automotive applications, surround view systems are often also called 360-degree video systems. These systems increase driver visibility, which is a valuable capability when undertaking low-speed parking maneuvers, for example. They present a top-down (i.e. "bird’s-eye") view of the vehicle, as if the driver was positioned above the car. Images from multiple cameras combine into a single perspective, presented on a dashboard-mounted display. Such systems typically use 4-6 wide-angle cameras, mounted on the rear, front and sides of the vehicle, to capture a full view of the surroundings. And the computer vision-based driver safety features they support, implementing various image analysis techniques, can warn the driver or even partially-to-completely autonomously operate the vehicle.
Surround view system architectures implement two primary, distinct functions:
- Camera calibration: in order to combine the multiple camera views into a single image, knowledge of each camera’s precise intrinsic and extrinsic parameters is necessary.
- Synthesis of the multiple video streams into a single view: this merging-and-rendering task combines the images from the different cameras into a single natural-looking image, and re-projects that resulting image on the display.
Calibration
In order to successfully combine the images captured from the different cameras into a single view, it's necessary to know the extrinsic parameters that represent the location and orientation of the camera in the 3D space, as well as the intrinsic parameters that represent the optical center and focal length of the camera. These parameters may vary on a per-camera basis due to manufacturing tolerances in the factory; they can also change after the vehicle has been manufactured due to the effects of accidents, temperature variations, etc. Each camera's extrinsic parameters can even be affected by factors such as vehicle load and tire pressure. Therefore, camera calibration must be repeated at various points in time: during camera manufacturing, during vehicle assembly, at each vehicle start, and periodically while driving the car (Figure 1).

Figure 1. Multiple calibration steps, at various points in time throughout an automotive system's life, are necessary in order to accurately align images (courtesy ADASENS and videantis).
One possibility, and a growing trend, is to integrate this calibration capability within the camera itself, in essence making the cameras in a surround view system self-aware. Calibration while the car is driving, for example, is known as marker-less or target-less calibration. In addition, the camera should also be able to diagnose itself and signal the operator if the lens becomes dirty or blocked, both situations that would prevent the surround view system from operating error-free. Signaling the driver (or car) in cases when the camera can’t function properly is particularly important in situations involving driver assistance or fully automated driving. Two fundamental algorithms, briefly discussed here, address the desire to make cameras self-aware: target-less calibration based on optical flow, and view-block detection based on machine learning techniques.
Calibration can be performed using the vanishing point theory, which estimates the position and orientation of the camera in 3D space (Figure 2). Consecutive frames from a monocular camera, in combination with CAN (Controller Area Network) bus-sourced data such as wheel speeds and the steering wheel angle, are inputs to the algorithm. The vanishing point is a virtual point in 2D image coordinates that corresponds to a point in the 3D space where 2D projections such as a set of parallel line converge. Using this method, the roll, pitch and yaw angles of a camera can be estimated with accuracies of up to 0.2°, and without need for markers. Such continuously running calibration is also necessary in order to adapt the camera to short and long-term changes, and it can be used as an input for other embedded vision algorithms such as a crossing-traffic alert, which calculates time-to-collision that is then used to trigger a warning to the driver.

Figure 2. The vanishing point technique, which estimates the position and orientation of a camera in 3D space, is useful in periodically calibrating it (courtesy ADASENS and videantis).
Soil or blockage detection is based on the extraction of image quality metrics such as sharpness and saturation (Figure 3). This data can then trigger a cleaning system, for example, as well as provide a confidence level to other system functions, such as an autonomous emergency braking system that may not function correctly if one or multiple cameras are obscured. Soil and blockage detection extracts prominent image quality metrics, which are combined into a feature vector and "learned" using a support vector machine, which performs discriminative feature identification. Temporal filtering, along with a hysteresis function, are also incorporated in the algorithm in order to prevent "false positives" due to short-term changes and soil-based flickering.

Figure 3. A camera lens that becomes dirty or blocked could prevent the surround view system from operating error-free (courtesy ADASENS and videantis).
Merging and Rendering
The next step in the process involves combining the captured images into a unified surround view image that can then be displayed. It involves re-projecting the camera-sourced images, originally taken from different viewpoints, and more generally merging the distinct video streams. In addition the live images themselves, it utilizes the various virtual cameras' viewpoint parameters, as well as the characteristics of the surface that the rendered image will be re-projected onto.
One common technique is to simply project the camera images onto a plane that represents the ground. However, this approach results in various distortions; for example, objects rising above the ground plane, such as pedestrians, trees and street lights, will be unnaturally stretched out (Figure 4). The resulting unnatural images making it harder for the driver to accurately gauge distances to various objects. A common improved technique is to render the images onto a bowl-shaped surface instead. This approach results in a less-distorted final image, but it still contains some artifacts. Ideally, therefore, the algorithm would re-project the cameras' images onto the actual 3D structure of the vehicle’s surroundings.
Figure 4. Projection onto the ground plane tends to flatten and stretch objects (top); projection onto a "bowl" surface instead results in more natural rendering (bottom) (courtesy ADASENS and videantis).
System Architecture Alternatives
One typical system implementation encompasses the various cameras along with a separate ECU (engine control unit) "box" that converts the multiple camera streams into a single surround view image, which is then forwarded to the head unit for display on the dashboard (Figure 5). Various processing architectures for the calibration, computer vision, and rendering tasks are available. Some designs leverage multi-core CPUs or GPUs, while other approaches employ low-cost and lower-power vision processors. Videantis' v-MP4000HDX and v-MP6000UDX vision processor families, for example, efficiently support all required visual computing tasks, including calibration, computer vision, and rendering. Camera interface options include LVDS and automotive Ethernet; in the latter case, videantis' processors can also handle the requisite H.264 video compression and decompression, thereby unifying all necessary visual processing at a common location.
Figure 5. One common system architecture option locates surround view and other vision processing solely in the ECU, which then sends rendered images to the head unit (top). Another approach subdivides the vision processing between the ECU and the cameras themselves (bottom) (courtesy ADASENS and videantis).
Another prevalent system architecture incorporates self-aware cameras, thereby reducing the complexity in their common surround view ECU. This approach provides an evolutionary path toward putting even more intelligence into the cameras, resulting in a scalable system with multiple options for the car manufacturer to easily provide additional vision-based features. Enabling added functionality involves upgrading to more powerful and intelligent cameras; the base cost of the simplest setup remains low. Such an approach matches up well with the car manufacturer's overall business objectives: providing multiple options for the consumer to select from while purchasing the vehicle.
Marco Jacobs
Vice President of Marketing, videantis
Florian Baumann
Technical Director, ADASENS
Surround View in Professional Video Capture Systems
Surround video and VR (virtual reality) are commonly (albeit mistakenly) interchanged terms; as Wikipedia notes, "VR typically refers to interactive experiences wherein the viewer's motions can be tracked to allow real-time interactions within a virtual environment, with orientation and position tracking. In 360-degree video, the locations of viewers are fixed, viewers are limited to the angles captured by the cameras, and [viewers] cannot interact with the environment." With that said, VR headsets (whether standalone or smartphone-based) are also ideal platforms for live- or offline-viewing both 180- and 360-degree video content, which in some cases offers only an expanded horizontal perspective but in other cases delivers a full spherical display controlled by the viewer's head location, position and motion. The following essay from AMD describes the implementation of Radeon Loom, a surround video capture setup intended for professional use, thereby supporting ultra-high image resolutions, high frame rates and other high-end attributes.
One of the key goals of the Radeon Loom project was to enable real-time preview of 360-degree video in a headset such as an Oculus Rift or HTC Vive, while simultaneously filming it with a high-quality cinematic camera setup (see sidebar "Radeon Loom: A Historical Perspective"). Existing solutions comprise either low-end cameras, which don't deliver sufficient quality levels for Hollywood expectations, or very expensive high-end cameras that take lengthy periods of time to produce well-stitched results. After several design iterations, AMD came up with several implementation options (Figure 6).
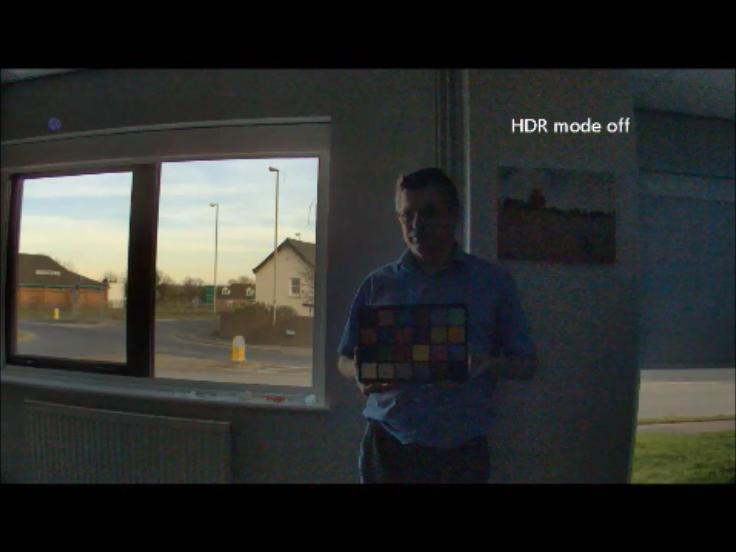
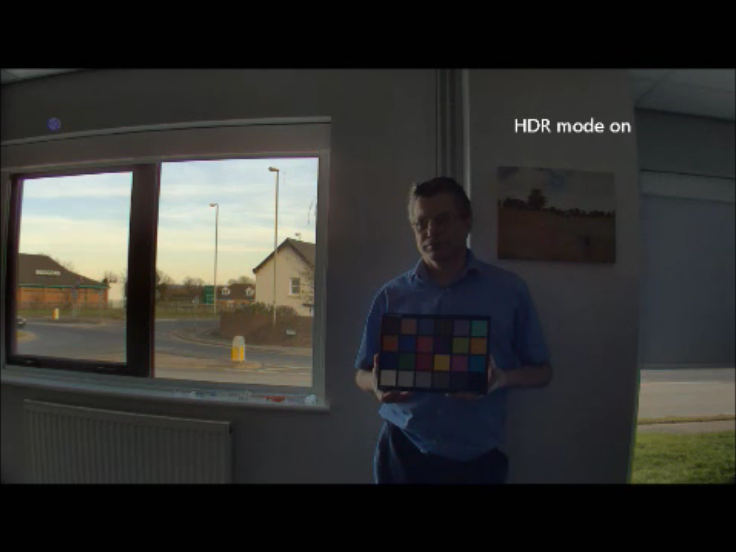
Figure 6. An example real-time stitching system block diagram (top) transformed into reality with AMD's Radeon Loom (bottom) (courtesy AMD).
Important details of the design include the fact that it uses a high-performance workstation graphics card, such as a FirePro W9100 or one of the newer Radeon Pro WX series. These higher-end cards support more simultaneously operating cameras, as well as higher per-camera resolutions. Specifically, Radeon Loom is using Black Magic cameras with HDMI outputs, converting them to SDI (Serial Digital Interface) via per-camera signal converters (SDI is common in equipment used in the broadcast and film industries). The Black Magic cameras support gen-lock (generator locking), which synchronizes the simultaneous start of multi-camera capture to an external sync-generator output signal. Other similar-featured (i.e. HDMI output and gen-lock input) cameras would work just as well.
Once the data is in the GPU's memory, a complex set of algorithms (to be discussed shortly) tackles stitching together all the images into a 360-degree spherical video. Once stitching is complete, the result is sent out over SDI to one or more PCs equipped with HMDs for immediate viewing and/or streaming to the Internet.
Practical issues on the placement of equipment for a real-time setup also require consideration. Each situation is unique; possible scenarios include filming a Hollywood production with a single equipment rig or broadcasting a live concert with multiple distributed cameras. With 360-degree camera arrays, for example, you don’t generally have an operator behind the camera, since he or she would then be visible in the captured video. In such a case, you would also probably want to locate the stitching and/or viewing PCs far away, or behind a wall or green screen, for example.
Why Stitching is Difficult
Before explaining how stitching works, let's begin with a brief explanation of why it's such a challenging problem to solve. If you've seen any high-quality 360-degree videos, you might have concluded that spherical stitching is a solved problem. It isn’t. With that said, however, algorithm pioneers deserve abundant credit for incrementally solved many issues with panoramic stitching and 360 VR stitching over the past few decades. Credit also goes to the companies that have produced commercial stitching products and helped bring VR authoring to the masses (or at least the early adopters).
Fundamental problems still exist, however: parallax, camera count versus seam count, and the exposure differences between sensors are only a few examples (Figure 7). Let's cover parallax first. Simply stated, two cameras in two different locations and positions will see the same object from two different perspectives, just as the same finger held close to your nose appears to have different backgrounds when sequentially viewed from each of your eyes (opened one at a time). Ironically, this disparity is what the human brain uses to determine depth when combining the images. But it also causes problems when trying to merge two separate images together and fool your eyes and brain into thinking they are one image.
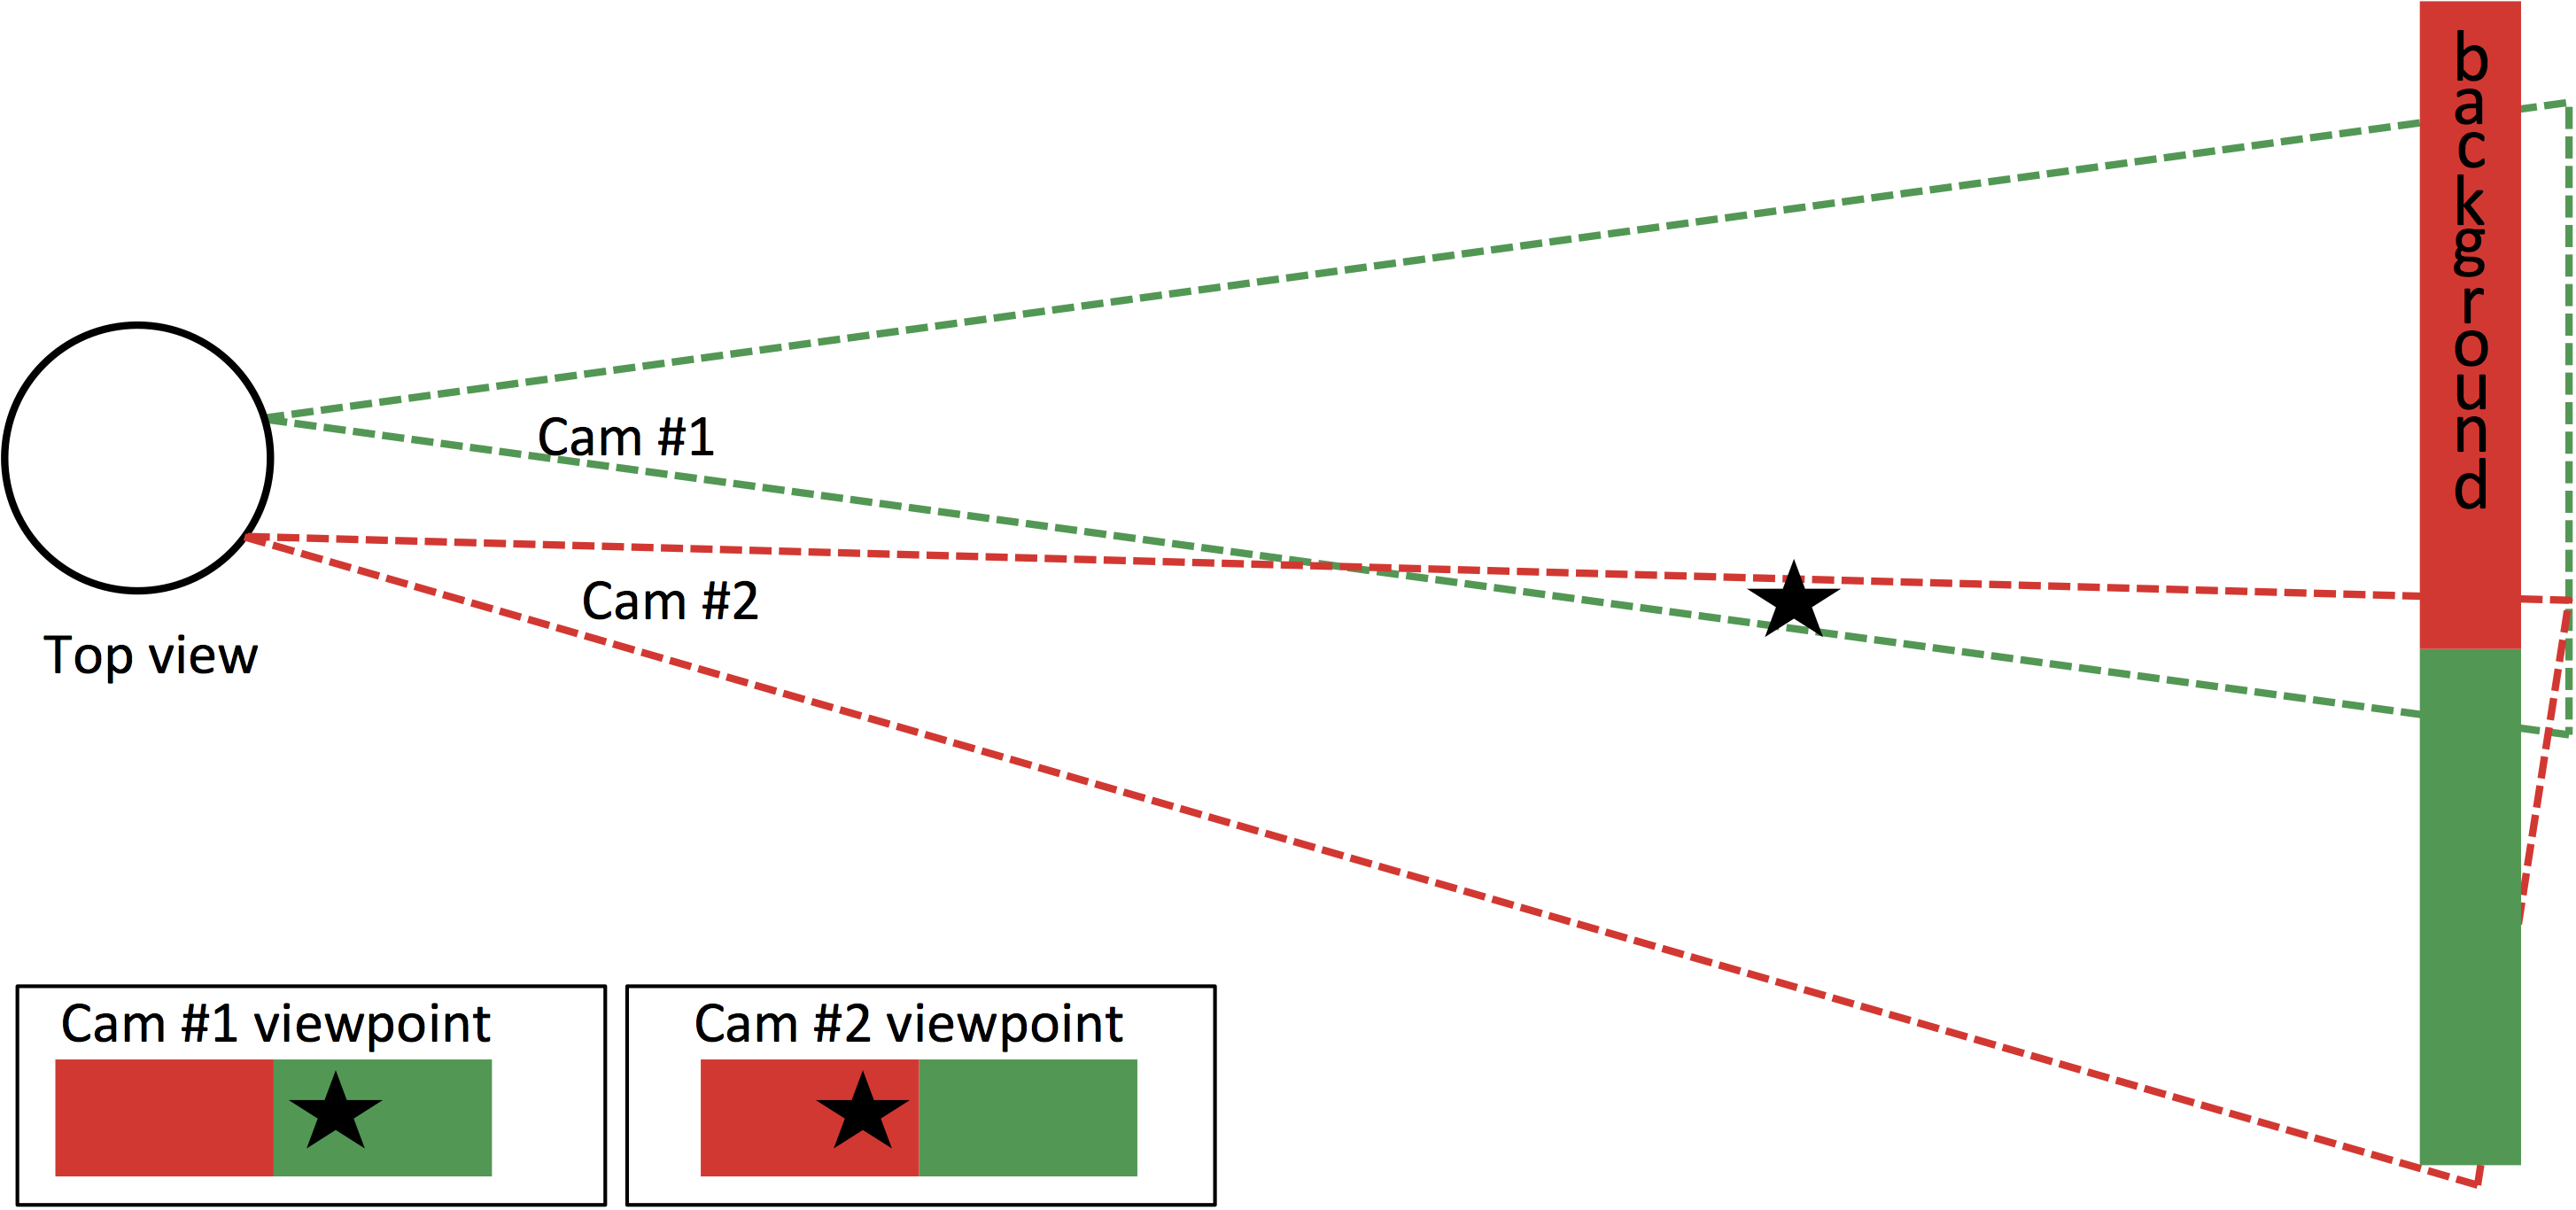
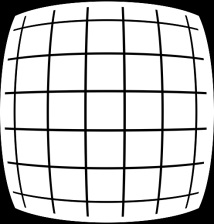
Figure 7. Parallax (top) and lens distortion effects (bottom) are several of the fundamental problems that need to be solved in order to deliver high-quality stitching (courtesy AMD).
The second issue: more cameras are generally better, because you end up with a higher effective resolution and improved optical quality (due to less distortion from more narrower-view lenses, versus fewer fisheye lenses). However, more cameras also means more seams between per-camera captured images, a scenario that creates more opportunities for artifacts. As people and other objects move across the seams, the parallax problem repeatedly reveals itself, with small angular differences. It is also more difficult to align all of the images when multiple cameras exist; misalignment leads to "ghosting." And more seams also means more processing time.
Each camera's sensor is also dealing with different lighting conditions. For example, if you're capturing a 360-degree video containing a sunset, you'll have a west-facing camera looking at the sun, while an east-facing camera is capturing a much darker region. Although clever algorithms exist to adjust and blend the exposure variations across images, this blending comes at the cost of lighting and color accuracy, as well as overall dynamic range. The problem is amplified in low-light conditions, potentially limiting artistic expression.
Other problems also exist, also with solutions, but at higher cost tradeoffs. For example, most digital cameras use a "rolling shutter" as opposed to the more costly "global shutter." Global shutter-based cameras capture every pixel at the same time. Conversely, rolling shutter cameras sequentially capture horizontal rows of pixels at different points in time. When stitching together images shot using rolling shutter-based cameras, some of the pixels in overlapping image areas will have been captured at different times, potentially resulting in erroneous disparities.
With those qualifiers stated, it's now time for an explanation of 360-degree video stitching and how AMD optimized its code to run in real time. To begin, let's look at the overall software hierarchy and the processing pipeline (Figure 8).

Figure 8. Radeon Loom's software hierarchy has OpenVX at its nexus (courtesy AMD).
An OpenVX™ Foundation
AMD built the Loom stitching framework on top of OpenVX, a foundation that is important for several reasons. OpenVX is an open standard supported by the Khronos Group, an organization that also developed and maintains OpenGL™, OpenCL™, Vulkan™ and many other industry standards. OpenVX is also well suited to this and similar software tasks, because it allows the underlining hardware architecture to optimally execute the compute graph (pipeline), while details of how the hardware obtains its efficiency don't need be exposed to upper software levels. The AMD implementation of OpenVX, which is completely open-sourced on Github, includes a Graph Optimizer that conceptually acts like a compiler for the whole pipeline.
Additionally, and by design, the OpenVX specification allows each implementation to decide how to process each workload. For example, processing could be done out of order, in tiles, in local memory, or handled in part or in its entirety by dedicated hardware. This flexibility means that as both the hardware and software drivers improve, the stitching code can automatically take advantage of these enhancements, similar to how 3D games automatically achieve higher frame rates, higher resolutions and other improvements with new hardware and new driver versions.
The Loom Stitching Pipeline
Most of the steps in the stitching pipeline are the same, regardless of whether you are stitching in real-time or offline (i.e. in batch mode) (Figure 9). The process begins with a camera rig capturing a group of videos, likely either to SD flash memory cards, a hard drive or digital video tape, depending on the camera model. After shooting, copy all of the files to a PC and launch the stitching application.

Figure 9. The offline stitching pipeline has numerous critical stages, and is similar to the real-time processing pipeline alternative (courtesy AMD).
Before continuing with the implementation details, let's step back for a second and set the stage. The goal is to obtain a spherical output image to view in a VR headset (Figure 10). However, it's first necessary to create a flat projection of a sphere. The 360-degree video player application will then warp the flat into a sphere. This, the most common method, is called an equirectangular projection. With that said, other projection approaches are also possible.
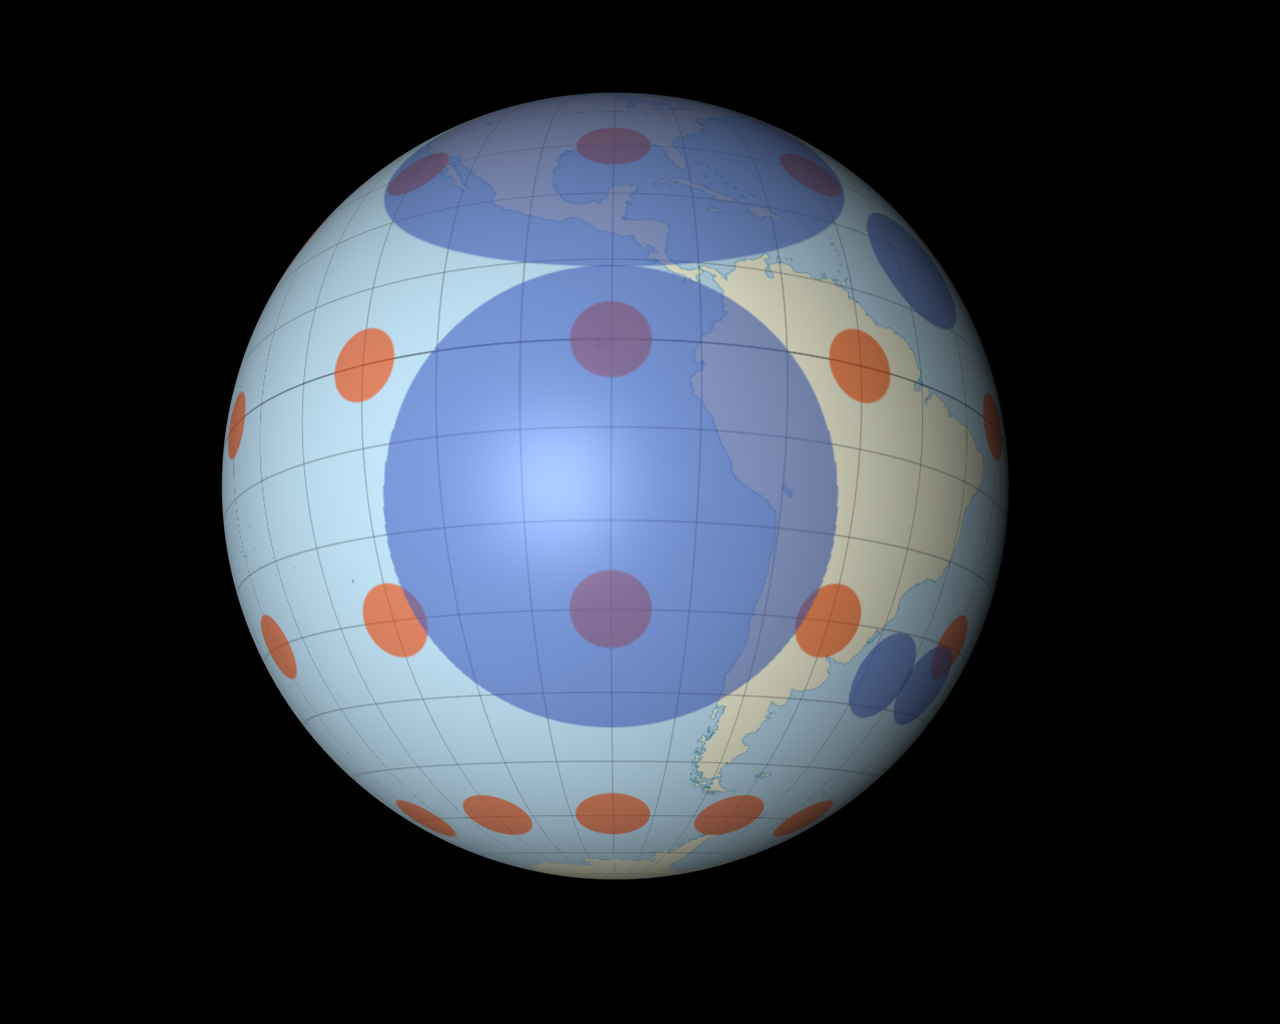
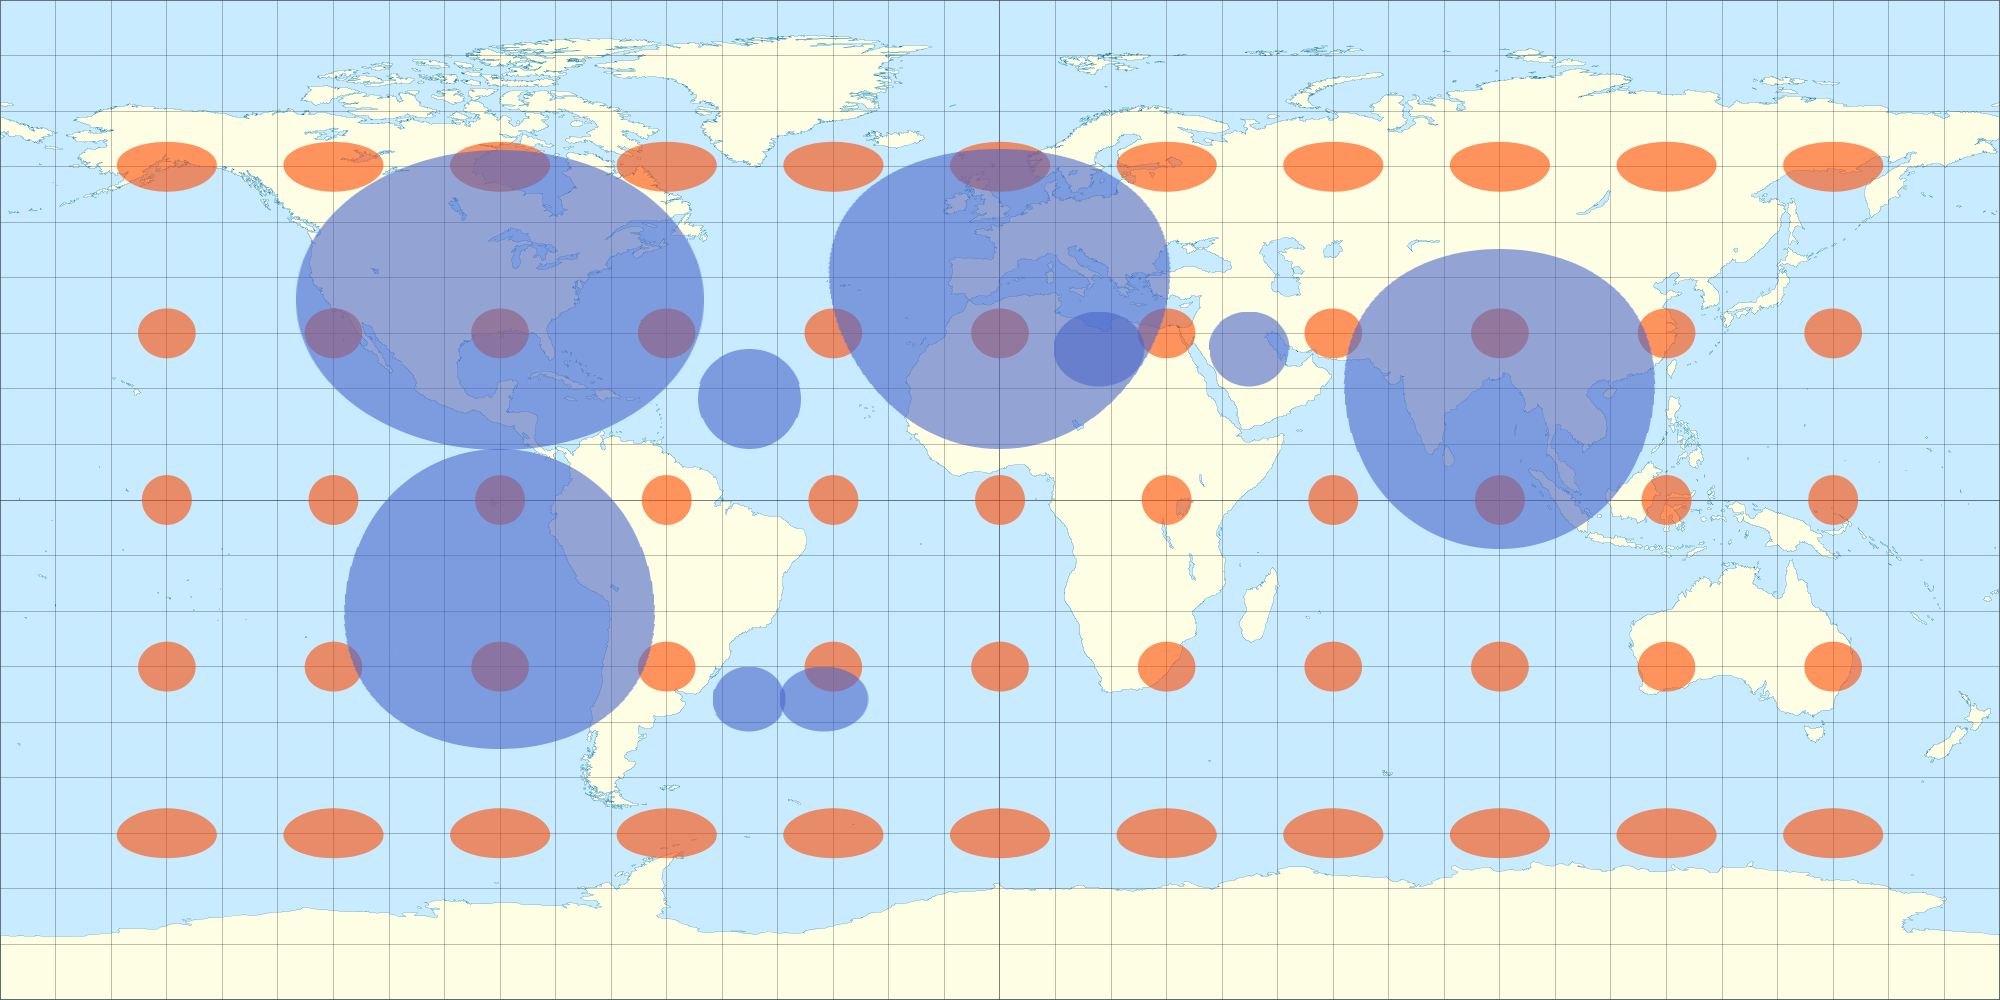
Figure 10. The goal, a spherical image to view in a headset (top), first involves the rendering of a flat projection, which is then warped (bottom) (courtesy AMD).
The first step in the pipeline is to decode each video stream, which the camera has previously encoded into a standard format, such as H.264. Next is to perform a color space conversion to RGB. Video codecs such as H.264 store the data in a YUV format, typically YUV 4:2:0 to obtain better compression. The Loom pipeline supports color depths from 8-bit to 16-bit. Even with 8-bit inputs and outputs, some internal steps are performed with 16-bit precision to maximize quality.
Next comes the lens correction step. The specifics are to some degree dependent on the characteristics of the exact lenses on your cameras. Essentially what is happening, however, is that the distortion artifacts introduced by each camera's lens are corrected to make straight lines actually appear straight, both horizontally and vertically (Figure 11). Fisheye lenses and circular fisheye lenses have even more (natural) distortion that needs to be corrected.
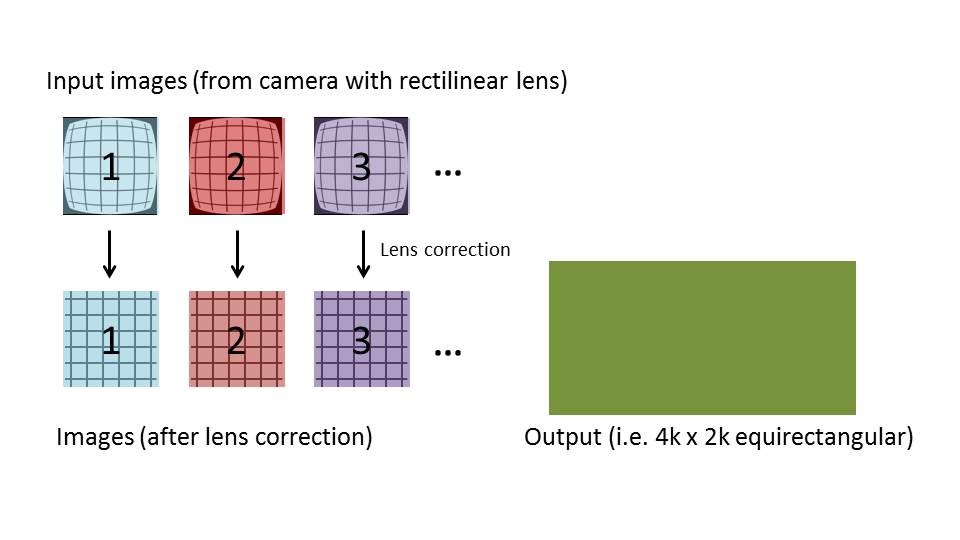
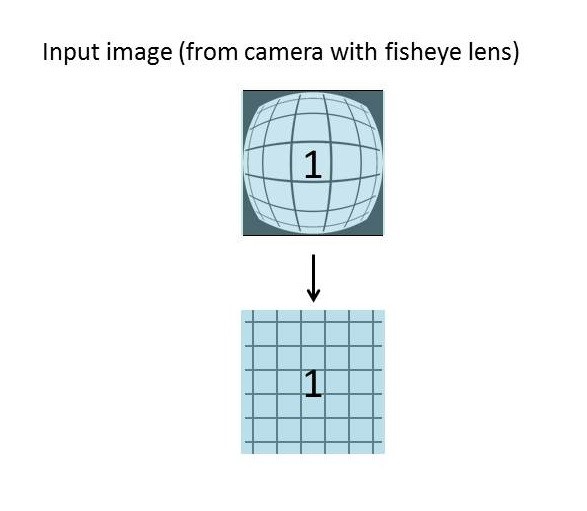
Figure 11. Lens distortion correction (top) is particularly challenging with fisheye lenses (bottom) (courtesy AMD).
Once this correction is accomplished, the next step warps each image into an intermediate buffer representing an equirectangular projection (Figure 12). At this point, if you simply merge all the layers together, you'll end up with a stitched image. This overview won't discuss in detail how to deal with exposure differences between images and across overlap areas. Note, however, that Loom contains seam-finding, exposure compensation and multi-band blending modules, all of which are required in order to obtain a good quality stitch balanced across the camera images and minimizing the seams' visibility of the seams. For multi-band blending, for example, the algorithms expand the internal data to 16 bits, even if the input source is 8 bits, and provide proper padding so everything can run at high speed on the GPU.

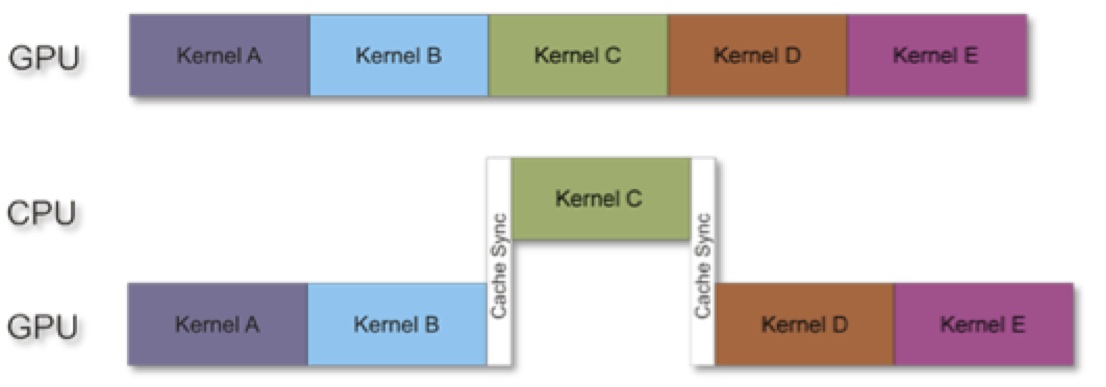
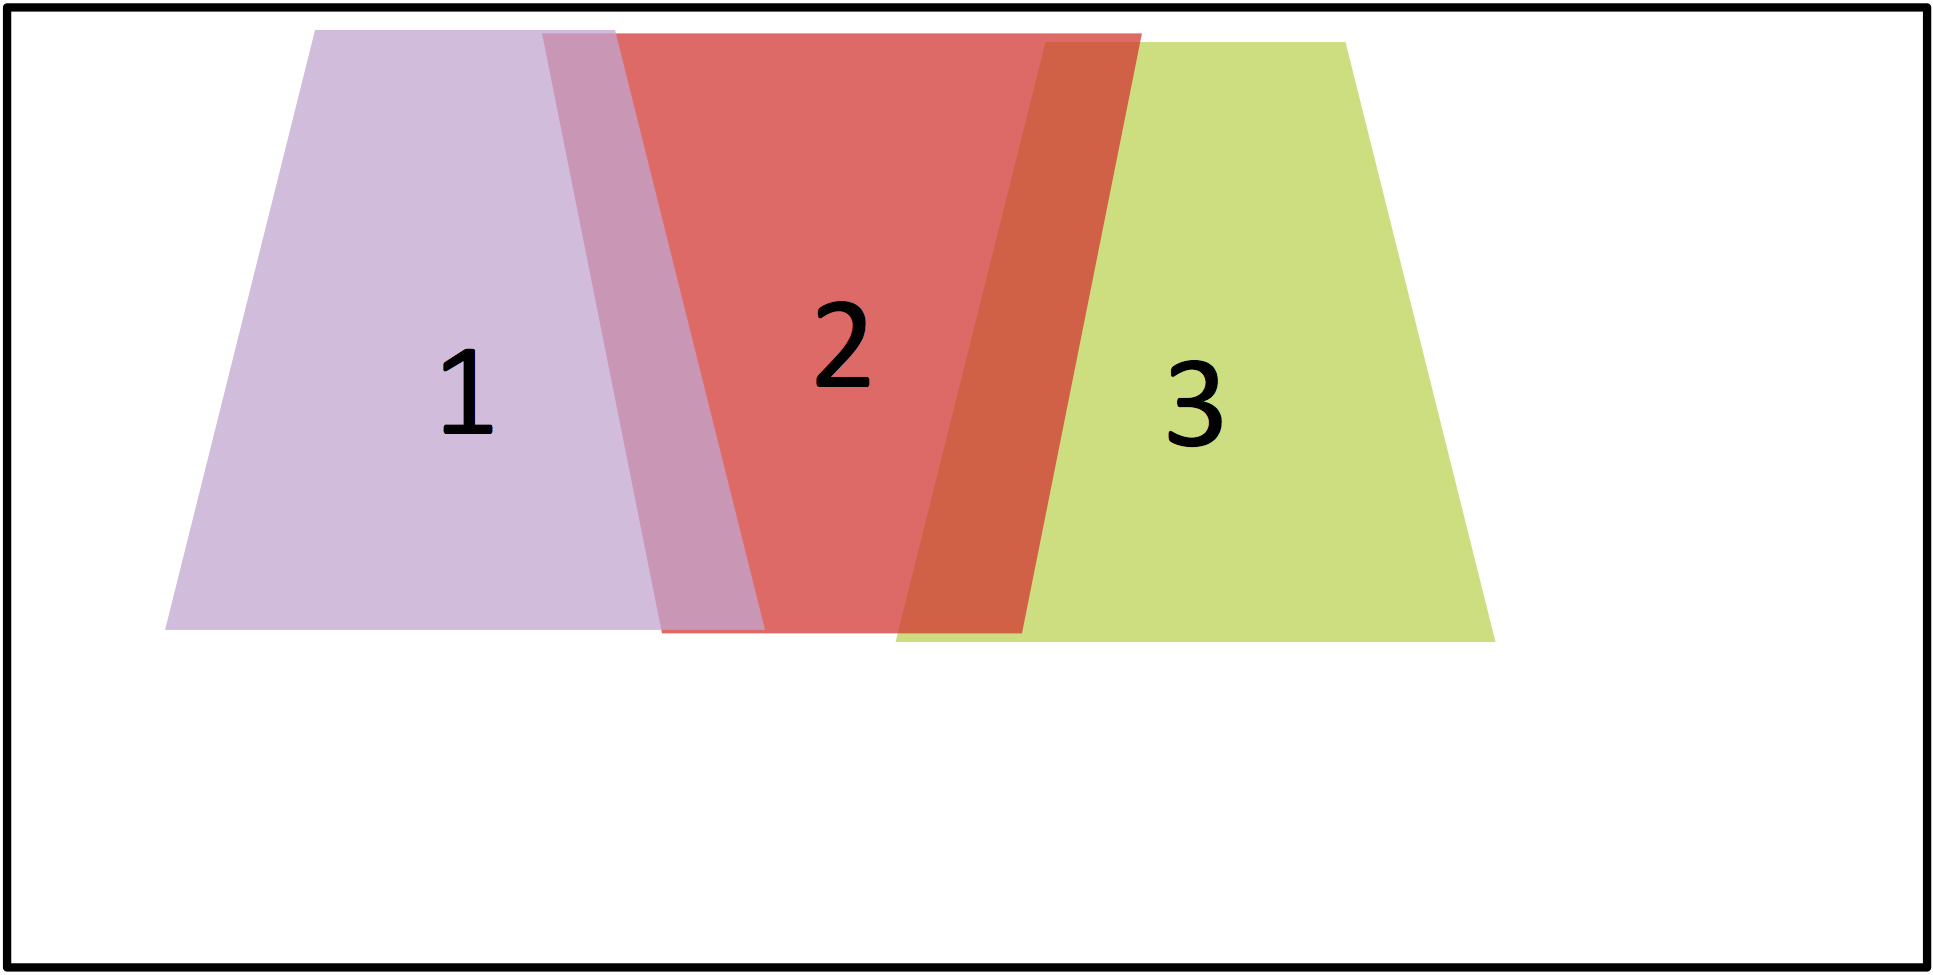
Figure 12. Warping the corrected images into equirectangular-sized intermediate buffers (top), then merging the layers together (middle), isn't alone sufficient to deliver high-quality results (bottom) (courtesy AMD).
Finding Seams
AMD's exploration and evaluation of possible seam-finding algorithms was guided by a number of desirable characteristics, beginning with "high speed" and "parallelizable." AMD chose this prioritization in order to be able to support real-time stitching with many lens types, as well as to be scalable across the lineup of GPUs. Temporal stability is also required, so that a seam would not flicker due to noise or minor motion in the scene at an overlap area. While many of the algorithms in academic literature work well for still images such as panoramas, they aren't as robust with video.
The algorithm picks a path in each overlapping region, and then stays with this same seam for a variable number of frames, periodically re-checking for a possible better seam in conjunction with decreasing the advantage for the original seam over time. Because each 360-degree view may contain many possible seams, not re-computing every seam on every frame significantly reduces the processing load. The complete solution also includes both seam finding and transition blending functions. The more definitive the seam, the less need there is for wide-area blending. Off-line (batch mode) processing supports adjustment of various stitching parameters in order to do more or less processing per seam on each frame.
While this fairly simple algorithm might work fairly well for a relatively static scene, motion across the seam could still be problematic. So AMD's approach also does a "lightweight" check of the pixels in each overlap region, in order to quickly identify significant activity in the overlap regions and flag these particular seams such that they can be promptly re-checked. All seams are grouped into priority levels; the highest priority candidates are re-checked first and queued for re-computation in order to minimize the impact on the system's real-time capabilities. For setups with a small number of cameras and/or in off-line processing scenarios, a user can default all seam candidates to the highest priority.
How to find the optimal path for each seam? Many research papers have been published, promoting algorithms such as max-flow min-cut (or graph cut), segmentation, watershed and the like. Graph cut starts by computing a cost for making a cut at each pixel and then finding a path through the region that has the minimum total cost. If you have the perfect "cost function," you’ll get great results, of course. But the point is to find a seam that is the least objectionable and remains so over time. In real-time stitching you can’t easily account for the future; conversely, in off-line mode a best seam over time can be found (in time).
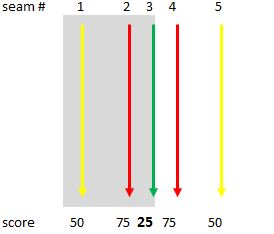
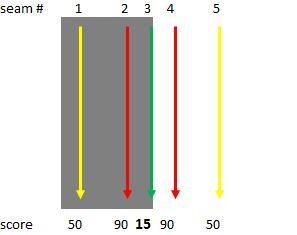
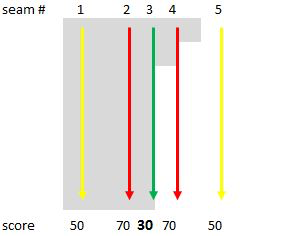
Before you can choose a cost function, you have to inherently understand what it is that you are trying to minimize and maximize (Figure 13). Good starting points are to cut along an edge and to not cross edges. The stronger the edge the better when following it; conversely, crossing over an edge is worst of all. And cutting right on an edge is better than cutting parallel to but some distance away from it, although some cases you may not have a nearby edge to cut on.
 |
 |
 |
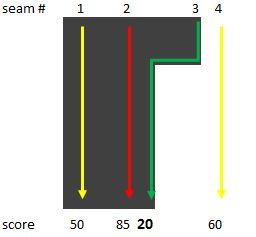 |
Figure 13. Sometimes, the best seam follows an edge (top left). In other situations, however, the stronger edge ends up with a lower "cost" score (top right). In this case, the theoretically best seam has the worst score, since it's not always on an edge (bottom left). Here, the best score follows an edge (bottom right) (courtesy AMD).
Computing a cost function leverages a horizontal and vertical gradient using a 3×3 Sobel function, for both phase and magnitude (Figure 14).
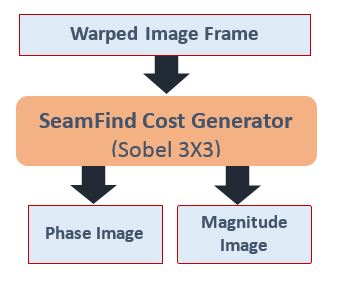
Figure 14. Seam candidate cost calculations leverage 3×3 Sobel functions (courtesy AMD).
Graph Cuts
In classical graph cut theory, an “s-t graph” is a mesh of nodes (pixels in this particular case) linked together (Figure 15). S is the starting point (source) and T is the ending point (sink). Each vertical and horizontal link has an associated cost for breaking that connection. However, the academic description may be confusing in this particular implementation, because when considering a vertical seam and a left and right image, S and T are on the left and right images, not the top and bottom of the seam.
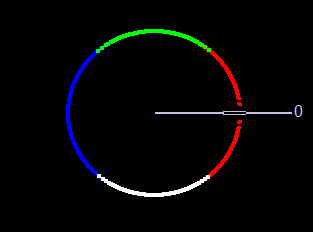
Figure 15. An “s-t graph” is a mesh of nodes linked together, with S the starting (source) point and T the ending (sink) point (courtesy AMD).
The graph cut method measures total cost, not average cost. Thus a shorter cut through some high-cost edges may get preference over longer cuts through areas of average cost. Some possible methodology improvements include segmenting the image and finding seams between segments, avoiding areas of high salience, computing on a pyramid of images, preferring cuts in high frequency regions, minimizing average error, etc.
Seam Cut
The algorithm begins by computing a cost, the Sobel phase and magnitude, at each pixel location. It then sums the accumulated cost along a path that generally follows the direction of the seam. It chooses a vertical, horizontal or diagonal seam direction based on the dimensions of the given seam. It looks at a pixel and 3 possible directions of the next pixel. For example in a vertical seam, moving from top to bottom a pixel has 3 pixels below it that can be considered – down-left, down or down-right. The lower cost of the three options is taken. Optionally, the algorithm potentially provides "bonus points" if a cut is perpendicular and right next to an edge.
This above process executes in parallel for every pixel row (or column) in the overlap area (minus some boundary pixels). After the algorithm reaches the bottom (in this case) of the seam, it compares all possible paths and picks the one with the lowest overall cost. The final step is to trace back up the path and set the weights for the left and right images (Figure 16).
 |
 |
Figure 16. The two overlap source images were taken from different angles (upper left and right). An elementary stitch of them produces sub-par results (middle). Stitching by means of a generated seam generates a superior output (courtesy AMD).
Mike Schmit
Director of Software Engineering, Radeon Technologies Group, AMD
Surround View in Consumer Video Capture Systems
AMD's Radeon Loom, as previously noted, focuses its attention on ultra-high-resolution (4K and 8K), high-frame rate and otherwise high-quality professional applications, and is PC-based. Many of the concepts explained in AMD's essay, however, are equally applicable to more deeply embedded system designs, potentially at standard HD video resolutions, with more modest frame rates and more mainstream quality expectations. See, for example, the following presentation, "Designing a Consumer Panoramic Camcorder Using Embedded Vision," delivered by CENTR (subsequently acquired by Amazon):
Lucid VR, a member of the Embedded Vision Alliance and an award winner at the 2017 Embedded Vision Summit's Vision Tank competition, has developed a consumer-targeted stereoscopic camera which captures the world the way human eyes see it – with true depth and 180 degree field of vision. When viewed within a virtual reality headset like Oculus Rift or Google Daydream with a mobile phone, the image surrounds the user, creating complete immersion. Here's a recent demonstration from the company:
Conclusion
Vision technology is enabling a wide range of products that are more intelligent and responsive than before, and thus more valuable to users. Vision processing can add valuable capabilities to existing products, and can provide significant new markets for hardware, software and semiconductor suppliers. High-quality surround view "stitching" of both still images and video streams via computer vision processing can not only create compelling immersive content directly viewable on VR headsets and other platform, but can also generate valuable visual information used by downstream computer vision algorithms for autonomous vehicles and other applications. By carefully selecting and optimizing both the "stitching" algorithms and the processing architecture(s) that run them, surround view functionality can be cost-effectively and efficiently incorporated in a diversity of products. And an industry association, the Embedded Vision Alliance, is also available to help product creators optimally implement surround view capabilities in their resource-constrained hardware and software designs.
By Brian Dipert
Editor-in-Chief, Embedded Vision Alliance
Sidebar: Additional Developer Assistance
The Embedded Vision Alliance, a worldwide organization of technology developers and providers, is working to empower product creators to transform the potential of vision processing into reality. AMD and videantis, co-authors of this article, are members of the Embedded Vision Alliance. The Embedded Vision Alliance's mission is to provide product creators with practical education, information and insights to help them incorporate vision capabilities into new and existing products. To execute this mission, the Embedded Vision Alliance maintains a website providing tutorial articles, videos, code downloads and a discussion forum staffed by technology experts. Registered website users can also receive the Embedded Vision Alliance’s twice-monthly email newsletter, Embedded Vision Insights, among other benefits.
The Embedded Vision Alliance’s annual technical conference and trade show, the Embedded Vision Summit, is coming up May 22-24, 2018 in Santa Clara, California. Intended for product creators interested in incorporating visual intelligence into electronic systems and software, the Embedded Vision Summit provides how-to presentations, inspiring keynote talks, demonstrations, and opportunities to interact with technical experts from Embedded Vision Alliance member companies. The Embedded Vision Summit is intended to inspire attendees' imaginations about the potential applications for practical computer vision technology through exciting presentations and demonstrations, to offer practical know-how for attendees to help them incorporate vision capabilities into their hardware and software products, and to provide opportunities for attendees to meet and talk with leading vision technology companies and learn about their offerings. More information, along with online registration, is now available.
The Embedded Vision Alliance also offers a free online training facility for vision-based product creators: the Embedded Vision Academy. This area of the Embedded Vision Alliance website provides in-depth technical training and other resources to help product creators integrate visual intelligence into next-generation software and systems. Course material in the Embedded Vision Academy spans a wide range of vision-related subjects, from basic vision algorithms to image pre-processing, image sensor interfaces, and software development techniques and tools such as OpenCL, OpenVX and OpenCV, along with Caffe, TensorFlow and other deep learning frameworks. Access is free to all through a simple registration process.
The Embedded Vision Alliance and its member companies periodically deliver webinars on a variety of technical topics, including various deep learning subjects. Access to on-demand archive webinars, along with information about upcoming live webinars, is available on the Alliance website. Also, the Embedded Vision Alliance is offering offering "Deep Learning for Computer Vision with TensorFlow," a series of both one- and three-day technical training class planned for a variety of both U.S. and international locations. See the Alliance website for additional information and online registration.
Sidebar: Radeon Loom: A Historical Perspective
The following essay from AMD explains how the company came up with its "Radeon Loom" project name, in the process providing a history lesson on human beings' longstanding desires to engross themselves with immersive media.
People have seemingly an innate need to immerse themselves in 360-degree images, stories and experiences, and such desires are not unique to current generations. In fact, it's possible to trace this yearning for recording history, and for educating and entertaining ourselves through it, from modern-day IMAX, VR and AR (augmented reality) experiences all the way back to ancient cave paintings. To put today's technology in perspective, here's a sampling of immersive content and devices from the last 200+ years:
- 1792: The first “panorama” circular paintings
- 1883: The Gettysburg Cyclorama
- 1893: Edison’s Kinetoscope
- 1900: The first VR hot air balloon ride
- 1929: Ed Link and the first flight simulators
- 1955: Disney’s Circarama
- 1950s-1960s: Morton Heilig, the father of VR?
- 1961: Philco's first HMD (head-mounted display)
- 1962: A VR kiosk experience
- 1968: Ivan Sutherland’s headset (PDF)
- 1995: Nintendo’s Virtual Boy
- 1990s: VR on TV and in the movies
Several interesting connections exist between the historical loom, an apparatus for making fabric, and modern computers (and AMD’s software running on them). The first and most obvious linkage is the fact that looms are multi-threaded machines, capable of being fed by thousands of threads to create beautiful fabrics and images on them. Radeon GPUs also run thousands of threads (of code instructions this time), and also produce stunning images.
Of particular interest is the Jacquard Loom, invented in France in 1801. Joseph Jacquard didn’t invent the original loom; he actually worked as a child in his parent’s factory as a draw-boy, as did many children of the time. Draw-boys, directed by the master weaver, manipulated the warp threads one by one; this was a job much more easily tackled by children's small hands. Unfortunately, it also required them to be up high on the loom, in a dangerous position.
Jacquard's experience later motivated him as an adult to develop an automated punch card mechanism for the loom, thereby eliminating his childhood job. The series of punched cards controlled the intricate patterns being woven. And a few decades later, Charles Babbage intended to use the same conceptual punch card system on his (never-built) Analytical Engine, which was an ancestor of modern day computing hardware and software.
When Napoleon observed the Jacquard Loom in action, he granted a patent for it to the city of Lyon, essentially open-sourcing the design. This grant was an effort to help expand the French textile industry, especially for highly desirable fine silk fabrics. And as industry productivity consequently increased, from a few square inches per day to a square yard or two per day, what did the master weavers do with their newfound time? They now could devote more focus on creative endeavors, producing designs with new patterns and colors every year, creations which they then needed to market and convince people to try. Today this is called the "fashion" industry, somewhat removed from its elementary fabric-weaving origins.

